Rising damp can be a big problem for homeowners, tenants, and landlords.
Not only can it cause mould and mildew, which can be harmful, it can also cause severe damage to properties if left untreated.
Spotting and dealing with rising damp can be tricky, so this guide outlines everything you’ll need to look out for and the steps you’ll need to take to fix the problem.
What is rising damp?
Rising damp occurs when moisture from the ground travels up through masonry walls, which soak it up like a sponge.
Brick and mortar are porous materials, so absorb moisture easily and in certain properties, this can make them susceptible to rising damp.
What causes rising damp in internal walls?
Most properties built after the 1940s have a damp-proof course (DPC), which prevents moisture travelling up through brickwork and masonry.
DPCs became mandatory in 1875, but properties built between then and the 1940s were sometimes equipped with substandard membranes which have failed in subsequent years.
Many properties built before 1875 weren’t fitted with DPCs at all and although many homes from that period have had work carried out to improve damp-proofing, some still exist with no DPC.
Properties that have had outside ground levels raised above the line of the DPC can also suffer with rising damp.
What are the signs of rising damp?
Pinpointing rising damp can be tricky, due to confusion with other forms of damp.
To correctly diagnose rising damp, look out for:
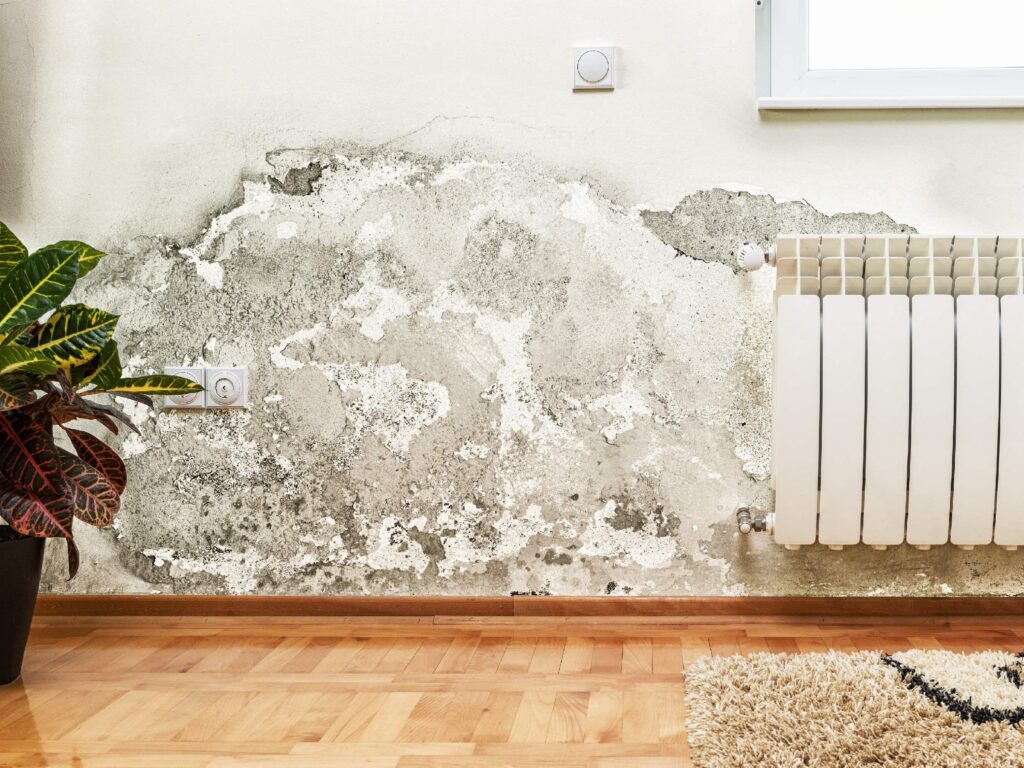
1. Tide marks on walls
Rising damp usually causes tide marks on internal walls, up to the level where the damp has reached and often up to a metre above any skirting board.
Ground moisture contains salts, and these are often left on internal walls once the moisture has evaporated.
So, look out for a crusty white deposit on walls where tide marks are present and for dark patches on walls that are damp to touch.
2. Bubbling plaster and peeling wallpaper
As moisture moves up through the internal walls, plasterboard or plaster itself will absorb the moisture and start to bubble.
Look out for blistering paint or peeling wallpaper, as well as bubbles and discolouration on plastered walls.
3. Rotting or decaying wood
Keep an eye out for rotting skirting boards, floorboards, or joists under flooring.
Moisture absorbed by wood can weaken it, causing rot and decay and signs of this can point towards rising damp.
Other forms of damp
Other types of damp problems in residential homes are:
- Penetrating damp
- Damp caused by condensation
All forms of damp can cause a damp and musty smell, as well as spores of black mould on walls and ceilings, and around window frames.
Condensation can gather around windows, meaning this form of damp is often misdiagnosed as rising damp.
And if signs of damp are high above ground level, such as in the corners of ceilings, this could be a penetrating damp problem rather than rising damp.
Penetrating damp is often caused by leaking gutters or roofs, meaning it can often be spotted higher up.
How do you fix rising damp?
The most comprehensive way to fix a problem with rising damp is by tackling the source.
That means either installing a new damp-proof course (DPC) or treating the problem with a chemical solution.
1. A new damp-proof course (DPC)
A new DPC is the most expensive and complicated way to solve an issue with rising damp – but also the most comprehensive solution.
If your property’s DPC has failed, or it doesn’t have a DPC, installing one can be a long process, where bricks are removed along the mortar course and a new membrane is installed.
However, a new, modern DPC should solve any problem with rising damp for the long-term.
2. Damp-proofing injection cream
A more cost-effective way to treat rising damp is through a chemical cream that is injected into your property’s mortar course.
The cream is pumped into the course through holes drilled in the course and reverts to liquid form once inside.
It then penetrates brickwork and cures to form a moisture-proof barrier.
3. Drainage and ground level
If water is failing to drain away from your property, or the external ground level has been built up above your damp-proof course (DPC), additional drainage or groundworks could be needed to solve any problem with rising damp.
Is it expensive to fix rising damp?
How much it costs to remedy a rising damp problem will depend on:
- The size of the property
- The scale of the problem
- The treatment required
Excavation work
If excavation work is needed to lower the ground level below the damp-proof course, it’s likely to cost between £300 and £2,000 depending on the amount of work involved.
Damp-proofing injection cream
Again, the cost of injecting a damp-proofing cream into the mortar course will vary depending on how many walls require treatment.
Costs are likely to be around £300 for a single wall, rising to £2,000 or more for a whole detached house.
A new or replacement damp-proof course
For properties with a breached or non-existent damp-proof course, often the best course of action is a new or replacement damp-proof course (DPC).
Again, the cost of installing a new DPC is likely to depend on the number of walls affected and the size of the property.
To insert a new DPC for one wall, the cost is likely to be in the region of £350, while a whole detached house is likely to be more than £2,000.
A new DPC can also be disruptive, as brickwork will need to be removed, re-laid and re-pointed once the new DPC is in place.
Can you treat rising damp yourself?
While it is possible to treat a rising damp problem yourself through injecting a damp-proofing cream, serious damp issues are best left to professionals.
However, there are further steps to take to eradicate the remnants of rising damp from inside your property once the problem has been treated…
1. Replaster affected walls
Rising damp can leave behind hydroscopic salts which will continue to attract moisture even after a rising damp problem has been remedied.
So, any walls affected by rising damp should be re-boarded and / or re-plastered once damp-proofing or excavation work is completed.
2. Drying out walls and wood
For walls that don’t need re-plastering, use a dehumidifier to help dry out plasterwork and wood like skirting or door architraves.
3. Repair and preparation
Once the walls are completely dry, use filler to repair any cracks or holes and sand back until smooth.
4. Paint with a stain blocker paint
To stop staining appearing through standard emulsion, use a stain blocker paint or damp seal before painting.